Ensuring the uniform thickness of electrode and separator film coating can prevent costly cell waste. This article considers the technical specifications to bear in mind when choosing a scanning thickness gauge. Chris Burnett, senior field marketing manager at Thermo Fisher Scientific, explores the challenges battery manufacturers face, and how to overcome them.
For manufacturers of lithium-ion batteries, controlling the thickness and profile uniformity of the cathode, anode and separator film coatings during production is crucial to final cell performance, making in-process coating thickness gauges essential for quality assurance. Choosing the right metrology tool is vital, as variations in coating thickness, an uneven profile or missed defects can drastically impact battery capacity and increase the risk of a thermal runaway.
Gauging the problem
In a conventional battery coating line, a quality-assurance technician is responsible for inspecting the product for defects and performing offline manual film thickness measurements. The line operator then uses these observations— together with their own experience and intuition— to adjust process parameters, which can sometimes be seen as more ‘art’ than science. This often leads to product inconsistencies due to the differing ability of individuals to identify defects. Similarly, infrequent manual film-thickness measurements can lead to products becoming out of tolerance before process adjustments can take effect.
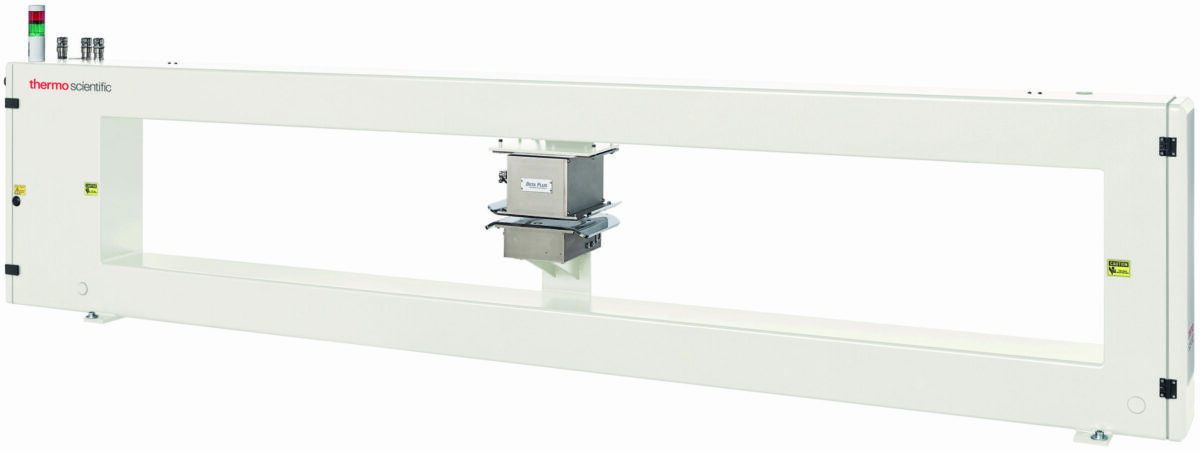
Ensuring a high-quality product while minimising quality control failure rates is essential for modern battery production, and continuous real-time monitoring can help to ensure battery base structures comply with design parameters, meeting the desired energy densities, recharge rates and physical dimensions. Even extremely small irregularities in the production process can significantly impact the geometry and function of the final product, so making use of state-of-the-art metrology— such as scanning thickness gauges— is essential. A scanning thickness gauge operates by shuttling a sensor back and forth across a moving reel of substrate, known as a foil, allowing real-time film thickness measurements and fault detection.
Choosing the right sensor
The ability of the gauge to accurately detect coating variation is dependent on several factors, the first one being its sensor. Successful film measurement using a scanning thickness gauge relies heavily on the choice of sensor, and its ability to measure the desired features. For example, while using a pair of confocal lasers is suited to film thickness measurements, coating weight is best estimated via the amount of X-ray or beta radiation absorbed by the foil, while analysis of infra-red emissions or optical inspection is better suited to defect identification. Furthermore, to reliably identify defects, it is imperative to choose a sensor with a suitable resolution, precision and beam size for your applications. This is especially important in battery production, where reliable, high-resolution measurement of edge defects is crucial.
Once a suitable sensor is identified, the next parameter to consider is the scanning speed of the gauge— the pace at which it can traverse the foil— which determines the amount of foil measured in a given timeframe. Since the gauge moves perpendicularly relative to the foil processing direction, the sensor will essentially trace a zig-zag measurement path, inevitably allowing some defects to pass by undetected between passes. Intuitively, it may seem like the way to avoid this would be to increase the scanning speed in order to minimise the chance of a defect falling between subsequent passes but, while this will measure more of the foil, it may actually be to the detriment of the overall process. This is because, at high scanning speeds, the response time of the sensor may be insufficient to generate an accurate representation of the surface due to blurring of the data collected, increasing the risk of poorly resolved defects. In reality, it becomes a compromise between measurement accuracy and the amount of foil measured, balancing the scanning speed against the response time of the sensor.
Closing the loop
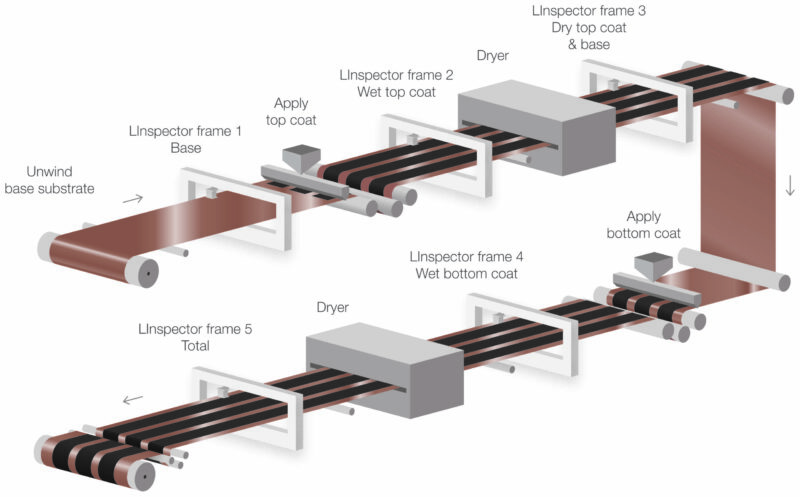
Obtaining accurate measurements is only half of the battle. The next consideration is how to use this information. The data generated by a scanning gauge can be used in several ways, depending on the level of automation employed in the process. In its simplest form, loading and thickness data is made visible to the operator, providing real-time insights to allow them to make informed manual process adjustments well in advance of subsequent offline measurements. This significantly reduces the chance of scrappage due to defects and out-of-tolerance coating.
This concept can be taken a step further by employing automatic profile control (APC), which uses an algorithm to form a feedback loop between process measurement and adjustment, eliminating delays associated with manual adjustments. This can significantly reduce not only the variability of the product but also the money spent on wasted raw materials. Similarly, taking a coating process from start-up to steady state requires careful tuning. When done manually, the results can differ greatly between individuals of various skill levels, with a trained operator typically taking around 40 minutes from line start-up to the coating reaching its target specification. The implementation of APC speeds up this process considerably, and can often lead to coating line start-up times being cut in half.
Like most modern processes in the Industry 4.0 era, coating lines equipped with top-of-the-range metrology are capable of outputting vast quantities of data. Providing this is stored methodically and securely, it can provide a valuable reference in the event of a downstream product defect; with everything from process capability index (CPK) values to time-stamped images able to be brought up at a moment’s notice for quality control and troubleshooting. For instance, in the case of thermal runaway being reported in a finished product, archived data can be quickly reviewed to determine whether the fault was due to an undetected defect or out-of-tolerance coating at the time of manufacture. The data can also be used to track the operating health of the coating line equipment, with any drift in values over time indicating that a particular piece of equipment may soon need maintenance or replacement.
Economic benefits
There are significant economic benefits to implementing state-of-the-art metrology into a coating line to ensure products closely adhere to the desired specification. A decrease of just 1gsm of lithium nickel manganese cobalt oxide on a one-metre-wide foil can save 25 tons of raw material per year— equivalent to around $700,000. However, it’s important to consider the limitations of your current manufacturing process, and have a clear idea of the upgrade benefits, before deciding on a particular gauge. If manual process adjustment is an acceptable compromise, then lower tier gauges may be more than adequate. However, if automation and traceability are the primary drivers behind coating line upgrades, then it’s important to purchase a high-specification scanning gauge with APC, and a means of analysing, storing, and recalling data. Battery specifications will only become more stringent in the future, and it will be imperative to fully embrace modern metrology in the quest for an ever more consistent product. After all— to paraphrase a famous quote by Peter Drucker— if you can’t measure it, you can’t fix it.

